
Editor’s notes: Head damage is a very common failure of HDDs (Hard Disk Drives), which will cost you valuable digital data stored on the HDD. More than 50% of the data lost cases we see are related or directly caused by head damage.
As an experienced professional forensic data recovery solution provider, SalvationDATA has helped our customers solved countless of data recovery cases worldwide. From the professional point of view, we would always suggest a head replacement when a head damage is confirmed. However, not all our customers possess the required skill sets or appropriate working environment for HDD physical operations. So in this article, we’ll introduce a solution to recover data from head damaged HDDs without head replacement. This can be accomplished by our Data Recovery System (DRS) selective head imaging technology.
Forensic Diagnostics
If you’ve been following our updates, you may have noticed that every time we would put diagnostics in the first place of a process flow. The importance of a pre-diagnostics speaks for itself. Only after having a full understanding of the HDD’s condition, will you be able to carry out the recovery process easily?
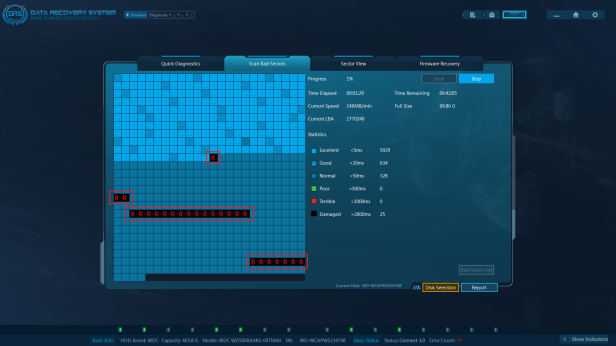
For a head damaged HDD, it is crucial to run a quick sector scan to learn the HDD’s health status. DRS’s bad sector scan function will help you to know how bad the head is. By running a quick scan process, DRS will diagnose the responding speed of the heads reading data from key sectors. You will be able to know the heads’ condition in just a few minutes scanning.
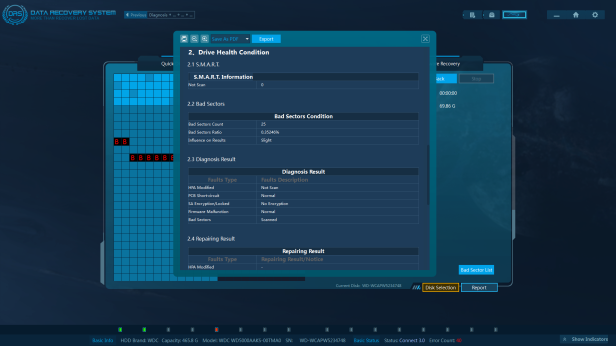
After scanning, press the Report button to generate a diagnostic report.
As shown in the example, after a quick scan of the HDD’s sector condition, many bad sectors are found. This is a typical outcome of a defective head. So how can we extract valuable data from such HDD without head replacement? Now let’s see how DRS make it possible by utilizing its selective head imaging technology.
Selective Head Imaging
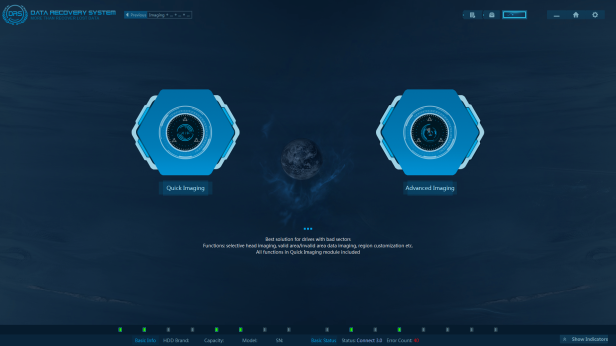
Selective head imaging is a technology specially designed for data extraction from damaged head HDDs. This function can be found in DRS’s Advanced Imaging module. Below is a quick instruction on how to make use of it to extract valuable data.
Choose Advanced Imaging on mode selection page.
Select the target defective HDD as the data source, set the imaging destination and continue to the imaging window.
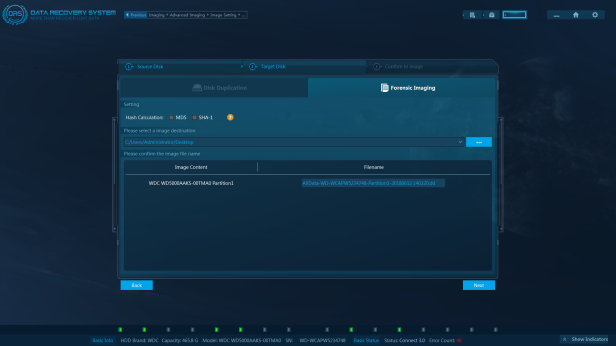
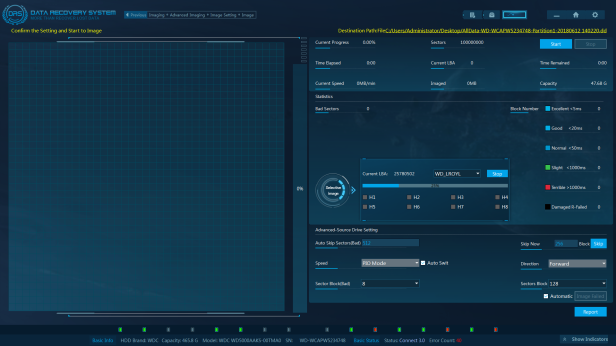
Now comes to the important part! In the imaging configurations, we can find the Selective Imaging options. Press Calculate and the system will automatically run head mapping. After the calculation is complete, we can start imaging and enable/disable any head to read/write data from the HDD.
In this example, when we enabled all heads for imaging, we found a huge number of bad sectors, and these bad sectors appear in a certain pattern. From this, we know that one of the heads is surely damaged, because whenever the one head reads data, bad sectors are detected.
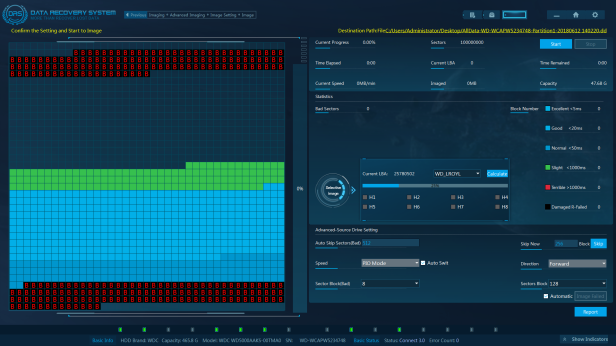
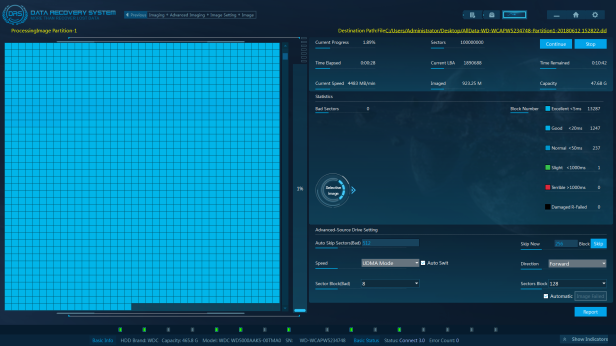
So next we need to find out which head is damaged and disable it. To do this, only enable one head at a time, and let it run for one or two minutes, then it will be easy to know which head is bad and which is good. Then only enable the good heads for imaging, we’ll be able to easily extract data from this defective HDD.
Conclusions
In this article, we introduced a practical solution to recover data from head damaged HDDs without head replacement. So even if you don’t have the professional skills or equipment, it is still possible to easily extract data from head damaged HDDs.
For more information, please check out our website: www.Salvationdata.com
Or contact us by [email protected]

Buenos dias mi nonbre es diego monzon yo e querido saber el valor del DRS pero nunca me envian un valor siempre me envia el correo de un asesor. Que no me dice nada aprecio que me enviaran el valor muchas gracias
赞赞
Hello sir, please share your email address, we will check who you talked before, and will send you information you need, sorry for this inconvenience.
赞赞