
Editor’s note: Physical Extraction by means of the Qualcomm and MediaTek chipset which was built in the smart devices will always be the most important way to do the forensic job! Even though we have posted numbers of articles named “Case Study” on the blogs to expound this solution, but there are inquiries and doubts from the users as still. So today we are going to review “how to do physical extraction for Qualcomm and MediaTek smart devices”.
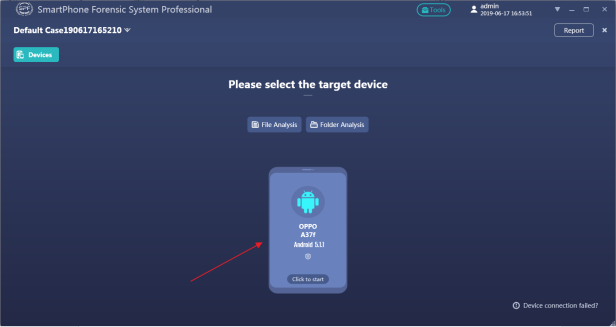
Physical extraction for Qualcomm chipset devices (for example OPPO a37f):
Step 1. Create a new case or load a history case to enter device selection page.
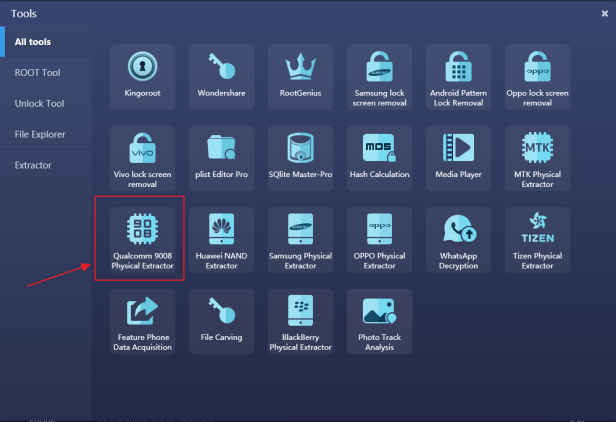
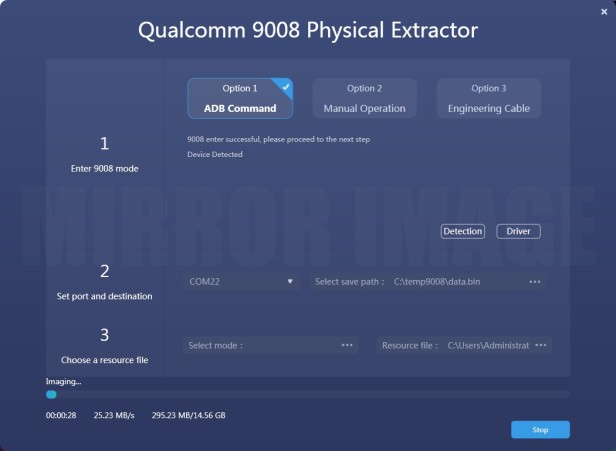
Step 2. Enter the “Tools Box” click and start the “Qualcomm 9008 Physical Extractor”.
Step 3. There are three options to enter the Qualcomm 9008 port displayed below, you can choose the appropriate way according to your situation,
Option 1): ADB Command —— A single click on option 1 and SPF Pro will automatically send an ADB command to the smart device and enable 9008 port. This option only works when the smart device can boot up and is connected to your PC with USB debugging.
Option 2): Manual Operation —— Press and hold both volume + & – when powering off the smart device for a few seconds to manually enable 9008 port mode.
Option 3): Engineering Cable —— Connect the target smart device to the PC through the engineering cable. Press the button on the cable to enable 9008 port.
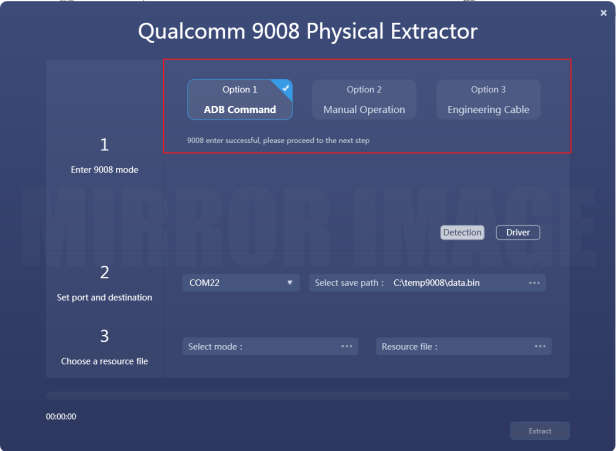
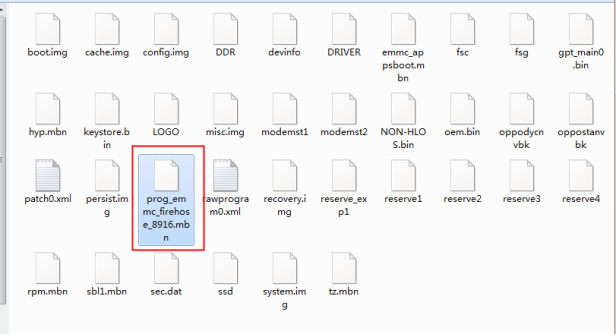
Step 4. After 9008 port has been successfully enabled, click “Detection” to verify. Select the correct port number from the COM port list and specify a destination path to save the image file, then select a correct mode in the support mode list, if the target mobile model hasn’t been included in the support mode list, then you can choose the resource file which you can download flash file from internet, after searching and downloading the correct flash file, select the file “prog_emmc_firehose_8916.mbn” into resource file, then click the “Extract” button to initiate the physical extraction process. (Noted: concern about the “.mbn” file is related to the same chipset of the target Qualcomm smartphone.)
Step 5. Wait for the image process has been completed, go back to the device selection page, and manually load the image file by clicking “File Analysis”.

Physical extraction for MediaTek smartphone (for example “Vivo” Y17T)
Step 1. Create a new case or load a history case to enter device selection page.
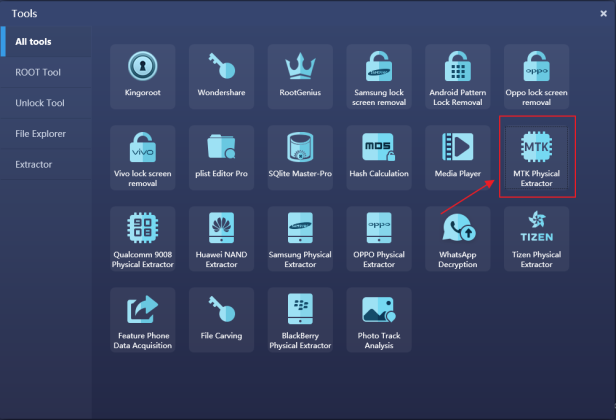
Step 2. Enter the “Tools Box” click and start the MTK Physical Extractor.
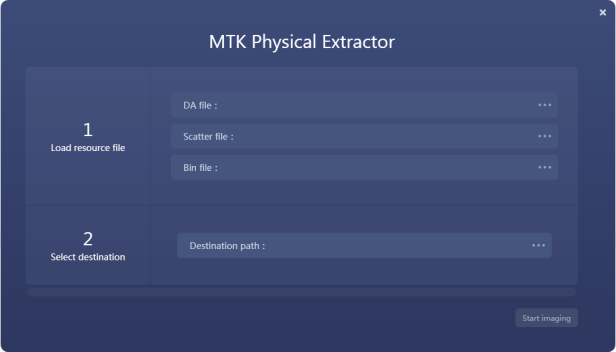
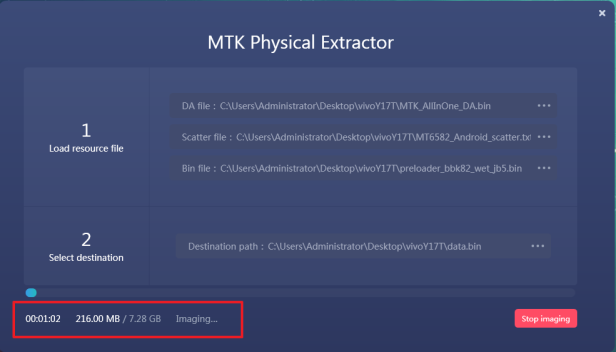
Step 3. Enter the physical extractor, choose the “DA file”, “Scatter file”, “Bin file” one by one, the scatter file and bin file you can download from the internet and make sure the correct one has been chosen before download. (Noted: concern about the scatter file is related to the same chipset of the target MediaTek smartphone.)
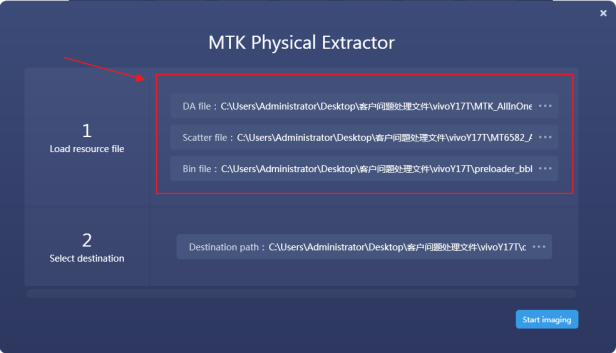
Step 4. Click the “Start imaging” button to initiate the process of image job for MediaTek smartphone. Wait for the image process has been completed, go back to the device selection page, and manually load the image file by clicking “File Analysis”.
Conclusion: Using the Physical Extraction technology to investigate the smartphone which was equipped with Qualcomm and MediaTek chipset, we can easily make a bit-by-bit image file from its flash memory even though the smartphone is abnormal: locked or broken. Moreover, not only the normal data can be extracted, but also the deleted and hide data can be extracted by our Physical Extractors.
The SalvationData experts will never stop developing the advanced technologies on digital forensics and assist the DFIR community to handle more and more mobile forensic cases. Browse the website for more information if you are interested, and the free trial of our forensic products is welcomed!

How useful is this if the device is encrypted?
赞赞
This can help you make a full image for the target device then load into our SPF for analysis, even the device is encrypted.
赞赞