
1 Background Knowledge
External hard drive, as a kind of portable storage media with large capacity, has been widely used today.
The physical structure of each external hard drive differs, though it looks just the same on the outside. Let’s look at some examples operating by SalvationDATA forensic experts:
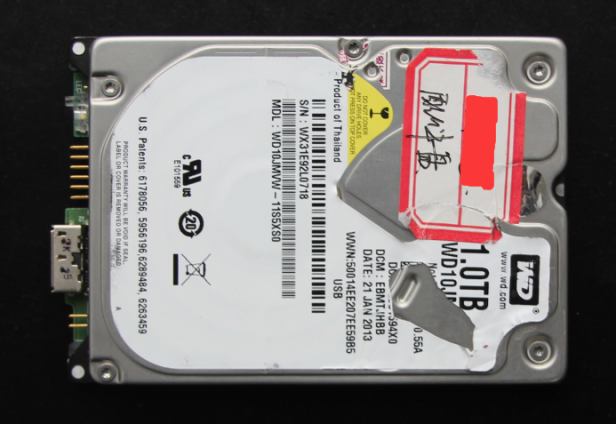
Example 1, external hard drives with the USB port on PCB.

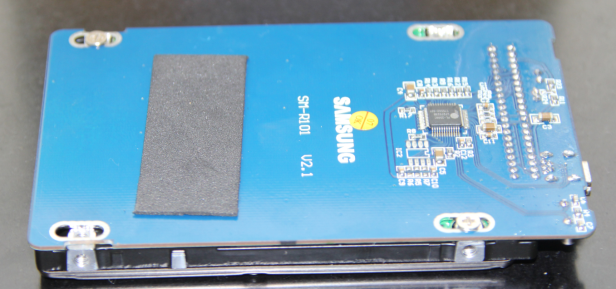
Example 2, external hard drive with IDE port that is converted to a USB port on the outside of the drive’s case.

2 Overview
Now we’ll take the second drive as an example to demonstrate how to recover data from the external hard drive. The problem with the hard drive is that it can’t be detected by the computer, so we can’t access data stored in it.
As there’re no such signs as heads clicking, we can rule out that the inaccessibility is caused by physical problems like head damage and platter scratch.
And the hard drive cannot be detected either when it is connected to DRS via USB port.

We can then assume that the inaccessibility is caused by USB port damage, but still, we need to remove the drive case for further confirmation.
3 Operation
3.1 Remove hard drive’s case.

Note: please be careful while operating with plastic inner buckle in case of any damage.
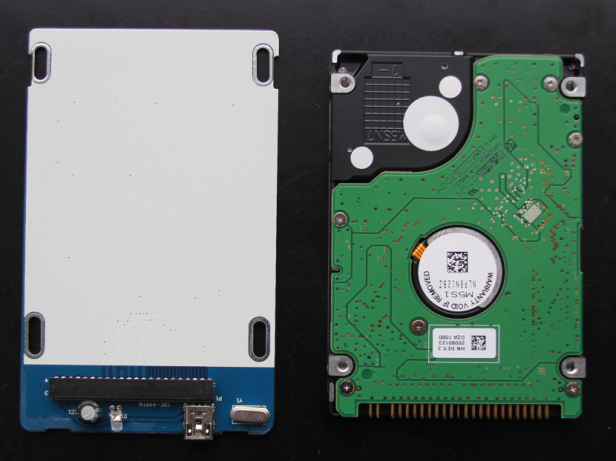
3.2 Remove the case from the hard drive. (refer to pic shown in example 2)
3.3 Connect the hard drive to DRS. (refer to the pic shown below)

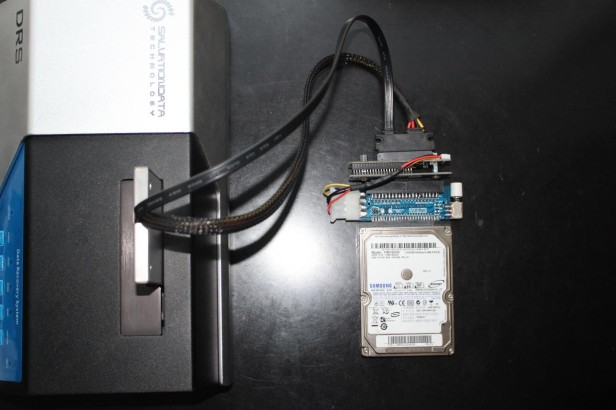
After completing the procedure above, power on DRS and launch DRS software. Now the hard drive can be detected, so now it is confirmed that the problem is on the adaptor, which leaves us 2 options, replace adaptor or use DRS to perform data recovery (procedure shown below).
4. Diagnose the whole drive with DRS Physical Diagnosis function module.
4.1 Select Physical Diagnosis and the system returns the result normally.

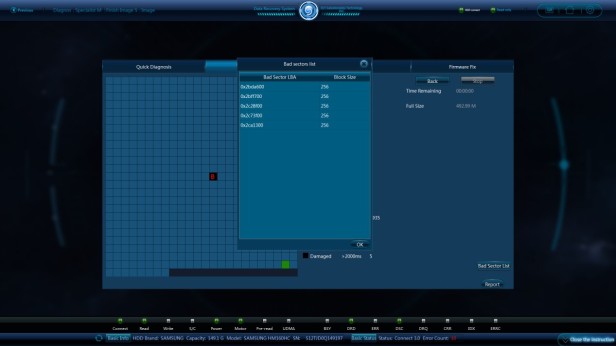
4.2 Select bad sectors scan: few bad sectors found.
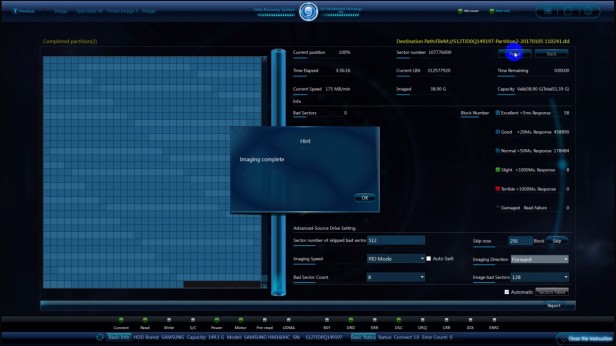
5. Image all data from the hard drive with DRS Imaging function module. As the aim is to recover only valid data, then only valid data needs to be imaged (the procedure is shown below).
5.1 Select Advanced Imaging.

5.2 Select valid data under the source partition.

5.3 Click Next, then select Image to File and choose to save path.

5.4 Click Next to start imaging after checking all parameters.
6. After completing imaging, load image file with DRS Data Recovery function module to recover lost data. Here, the user can use Quick Scan to speed up the recovery process. Please refer to the procedure below:
6.1 Select Data Recovery, then add image file.

6.2 Select the loaded image file, then click Scan to start data recovery.

6.3 Here’s a list of recovered data.

6.4 Click Root to select all files, then click Save to export recovered files.

6.5 Now data stored in the external hard drive mentioned in Example 2 is recovered successfully.

7 Summary
External hard drives differ from normal hard drives in physical structure. Unlike normal hard drives, external hard drives are wrapped in a case and are connected via USB port, which also makes the procedure of recovering data from external hard drives different. If the inaccessibility of an external hard drive is caused by malfunction USB port, we’ve got 2 options:
A. If the USB port is on the adaptor, we can replace it or remove the adaptor, then perform data recovery with DRS.
B. If the USB port is on the drive’s PCB, the only solution is to replace PCB.
