
Editor’s Note: In our previous posts, we showed VIP 2.0 can get access to the normal or even non-functioning DVR surveillance systems such as burnt, watered and damaged DVRs, and VIP 2.0 can also perform forensic data recovery from password-protected DVR directly. But if the surveillance system cannot be stopped, and the storage hard drive can not be taken out from the DVR, how can we retrieve the video clips?
Now forensic experts from SalvationDATA will introduce a fresh way to extract the target video clips from DVRs with VIP 2.0, that’s the “Network Extraction” function, which has been integrated into VIP from version 1.0 to version 2.0, and has solved many customers’ problems when dealing with cases. Network Extraction also provides one more chance to retrieve the CCTV footage on condition that the investigators cannot get access to the storage hard drive of DVRs.
Preconditions:
- A PC installed with VIP 2.0 used for video data extraction.
- The PC must be connected to the DVR directly with a network cable, or connected to the same local network with the DVR.
- Know the DVR’s access ID and PW, or if the DVR’s default PW has not been reset. (VIP automatically provides default passwords for the DVR brands it supports.)
- Only normal accessible video clips are extractable through Network Extraction.
OK, now we will introduce “Network Extraction” step by step.
1. Start VIP 2.0, Go to Network Extraction on the home page.
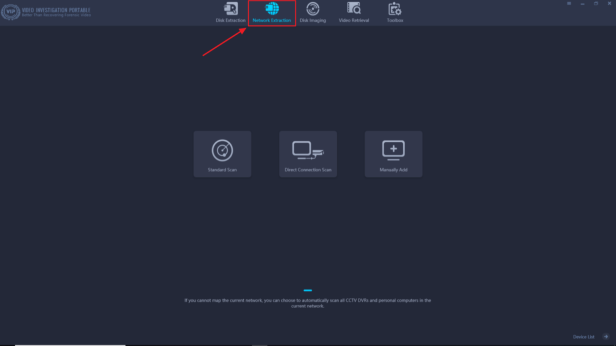
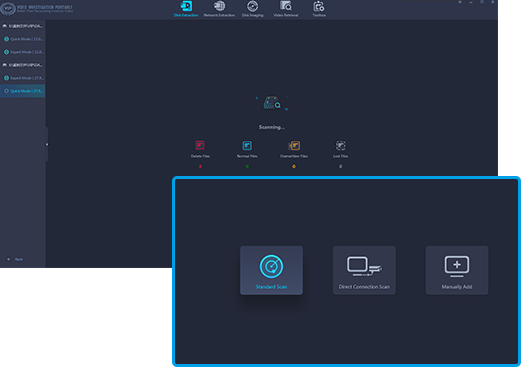
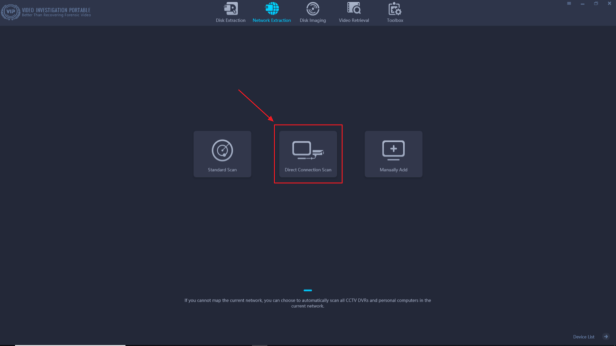
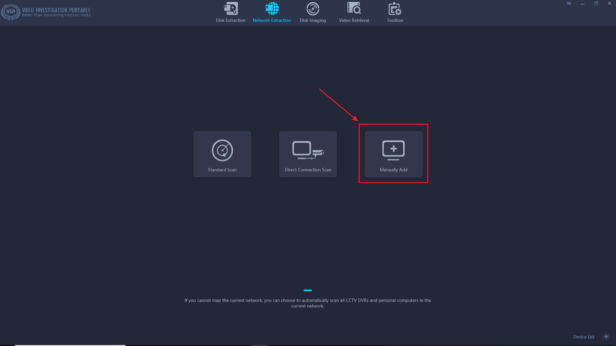
2. After entering the Network Extraction, there are 3 different ways provided to search the DVR LAN: Standard Scan, Direct connection Scan, Manual Scan.
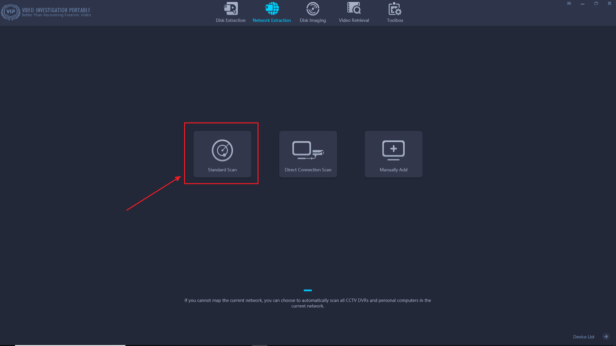
We choose standard scan to give you a brief example of the network extraction, on the standard scan, the PC must be connected to the same local network with the DVR through either hard or wireless connection.
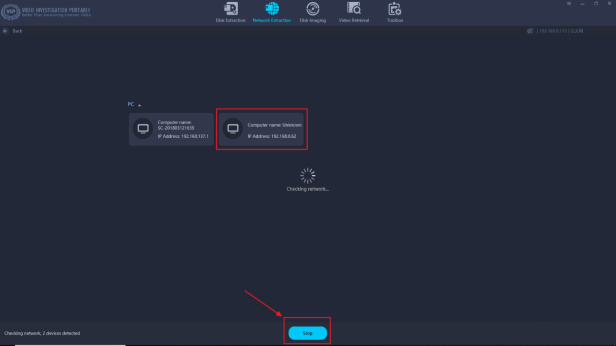
3. The System will start scanning automatically, press “Stop” when you see the target DVR IP address shown on the screen.
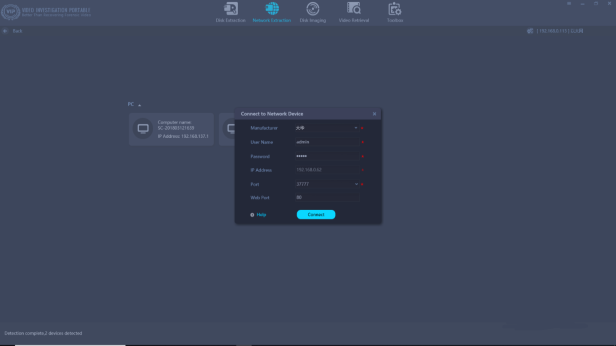
4. Check and verify DVR information, press “Connect” to access DVR.
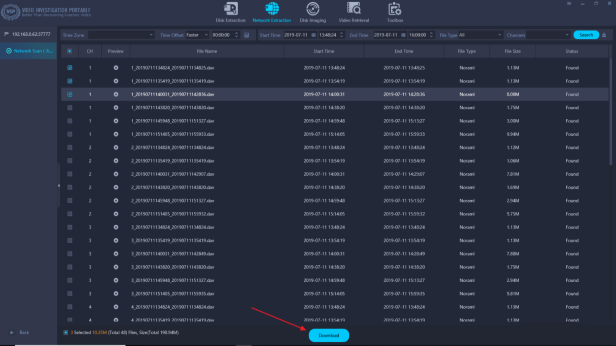
5. Single click pane to select the target video clips, press “Download” to extract the current case.
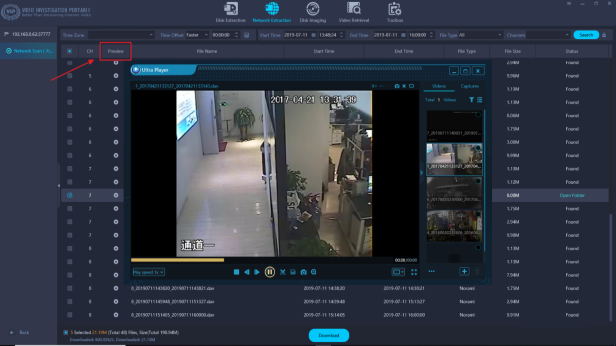
6. Press the play button to preview selected video clip with the integrated Ultra-player supporting most of the popular DVR video formats.
7. Another way to extract video data through a network connection is Direct Connection Scan, the PC must be connected to the DVR directly with a network cable, press Direct Connection Scan, and the following steps are the same as Standard Scan.
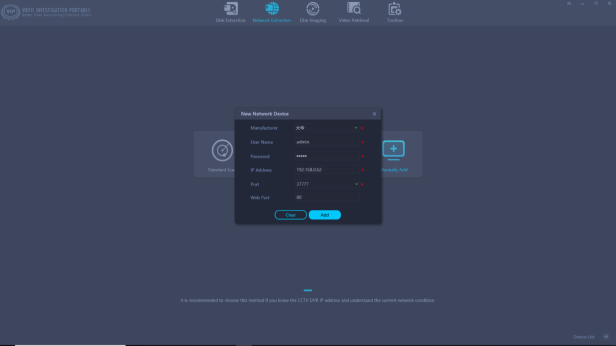
8. If you know the IP address of the DVR, Manual Scan is provided to save time for scanning the DVR. Connect to the same local network is also needed press Manual Scan.
9. Select the DVR vendor, input correct User name and Password, input the DVR’s IP address. (look for it in the DVR’s system settings)
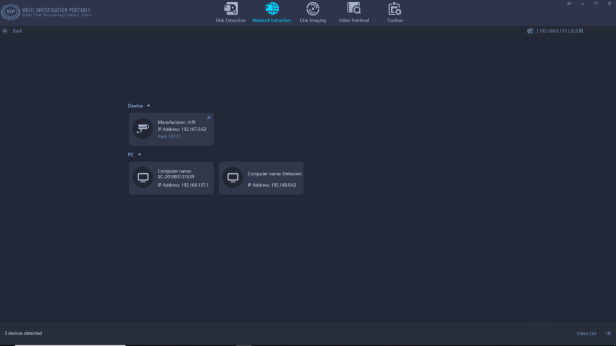
10. Select the DVR icon just added, the following steps are the same as Standard Scan.
You can also watch the video demo on our YouTube channel. And you can download the VIP 2.0 software from our resources page of the website or contact [email protected] to have a free trial!
