
Editor’s note: Data recovery is a crucial part of digital forensics. SalvationDATA’s Data Recovery System is a powerful data recovery tool that is capable of recovering and extracting important digital files from both good and damaged storage media. When dealing with a data recovery case, we sometimes struggle to find potentially useful evidence files from a big pile of recovered files. So today, our topic would be how to quickly locate potential evidence files with DRS.
Related Product: DRS (Data Recovery System)
File Sorting
After the file scanning process, DRS will automatically switch to the scanning result window. All files found are displayed here, and now what matters is how to search for the files we need. First, choose a file sorting mode that is most suitable for the case.
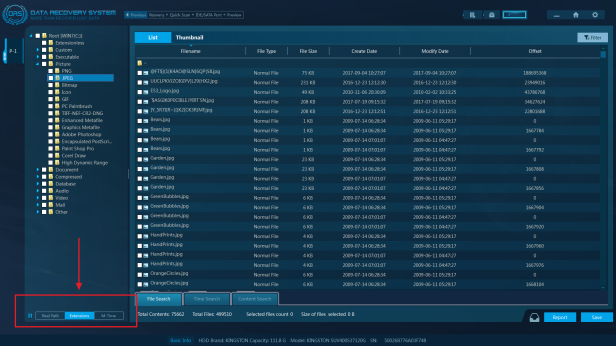
For example, if you know exactly where the files are stored before they are deleted, choose the real path display. If what you are looking for is a certain type of files (with certain file extension), you can sort the files by extensions. If you want to inspect the files in a certain time window, you can sort the files by time.
File Search
You can also directly search for the files of interest with DRS’s file search utilities. Choose one from the three searching options: file search, time search, and content search.
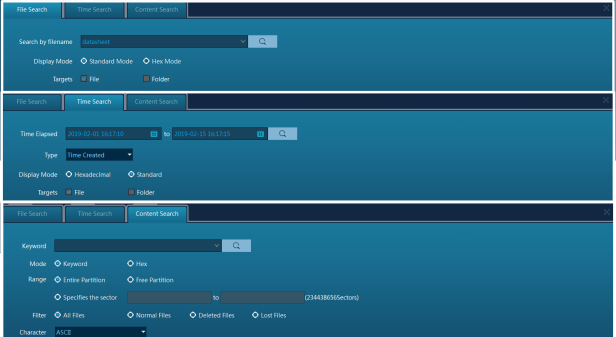
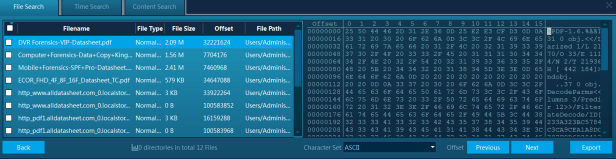
File Search: With this utility, you can directly search for target files if you know the file name. Besides standard mode, there’s also hex mode available. Hex mode gives you more professional views and options if you are a skilled digital forensic examiner.
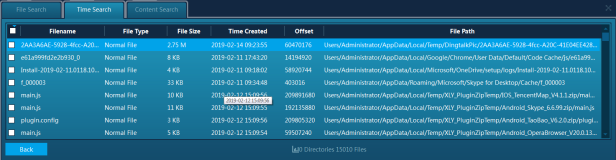
Time Search: This utility allows you to specify a time window to search and display all files within this time window. Also, support to display in standard mode and hex mode.
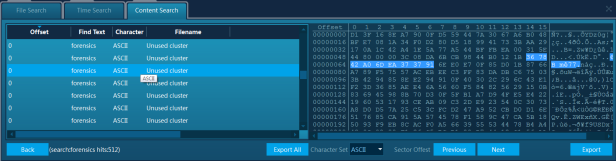
Content Search: This utility allows you to search for the keywords within a file content. For example. If you search for ‘drugs’, any file that contained this keyword in its content will be displayed.
Conclusion
After locating the target files from the recovery results, save or export them to your local drives for further inspections. Thanks for reading our [Tips] article! Keep following our blog, we’ll be posting more helpful small tips in the future. If you are interested in our forensic product, come and check out our website for more information. You can also go to our resource page to download our forensic products for free. We welcome you to contact us and claim your free product trial!
